In this guide, you'll find a complete step-by-step walkthrough on how to do Gusto payroll, from signup to submission.
Gusto is one of our top payroll software options for small businesses. With flexible payroll processing options, benefits management, employee onboarding, and more, Gusto has made a strong name for itself as a full-featured payroll software solution.
But how exactly does Gusto work? If you’ve already chosen Gusto, how do you get Gusto up and running? We’re here to cover the ins and outs of how to run Gusto.
How To Run Gusto Payroll
Running payroll with Gusto is quick, easy, and straightforward. Gusto’s payroll run process can be completed in five simple steps, starting with heading to your Gusto dashboard and selecting run payroll. Once you have the process down, running payroll with Gusto can be done in less than a minute.
Step 1: Sign Up For Gusto
First things first, you’ll need to compare the Gusto pricing plans and sign up for the account that fits your business best. Signing up for Gusto is an easy process (it took us only three and a half minutes when we signed up). You can go directly to Gusto and sign up online or watch our quick video on how to sign up for Gusto to learn exactly what the process entails beforehand.
Step 2: Complete Gusto Payroll Onboarding
To run payroll through Gusto, you’ll need to have completed the onboarding process. Before signing up, it’s important to make sure you have reviewed Gusto’s pricing plans to ensure that the software fits your business’s budget and payroll needs.
When you sign up for Gusto, you’ll be asked a series of questions, starting with whether you have already run payroll this year and your experience running payroll. You’ll answer further questions to provide information about your company and payroll, including benefits, business setting, and business location.
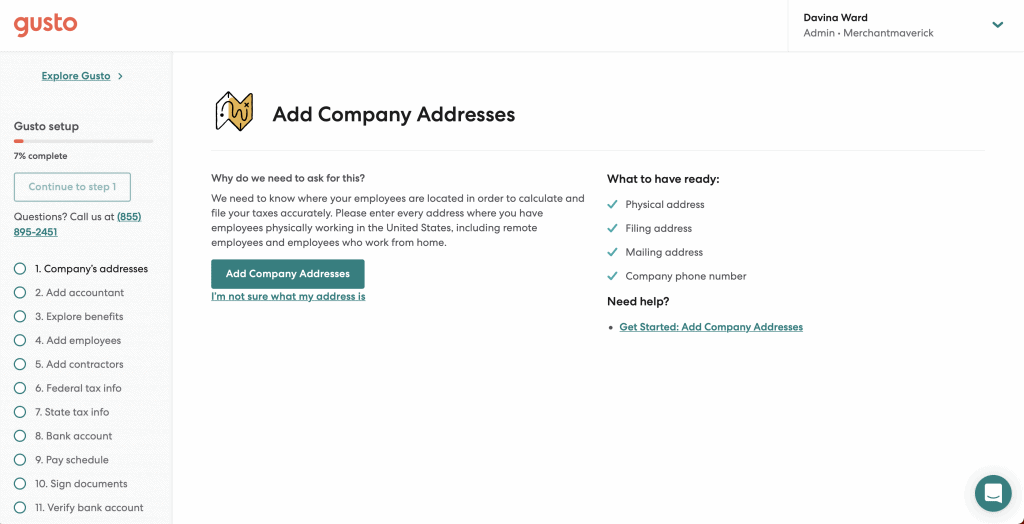
Once you submit the relevant information, Gusto will use that information to create a customized implementation experience for your business. The highlights of Gusto implementation includes submitting information about:
- Your company
- Employees or contractors
- Taxes
- Your business bank account
- Pay schedules
Although you’ll need to handle the Gusto implementation yourself, there’s something to be said for the process’s straightforwardness. There’s a lot of handholding built into the platform during implementation, such as the list of information and documents to have ready that you’ll see before each step.
Be sure to review the information before submitting it. Yes, reviewing can be tedious, especially after you’ve spent some time inputting tons of details. However, it will help you avoid spending a ton of time editing information in the future, or worse, correcting payroll mistakes with a looming deadline.
Step 3: Select Run Payroll From Your Gusto Dashboard
After wrapping up the onboarding process, you should be ready to complete your first payroll run in Gusto. You’ll be taken directly to your dashboard when you enter your Gusto payroll login.
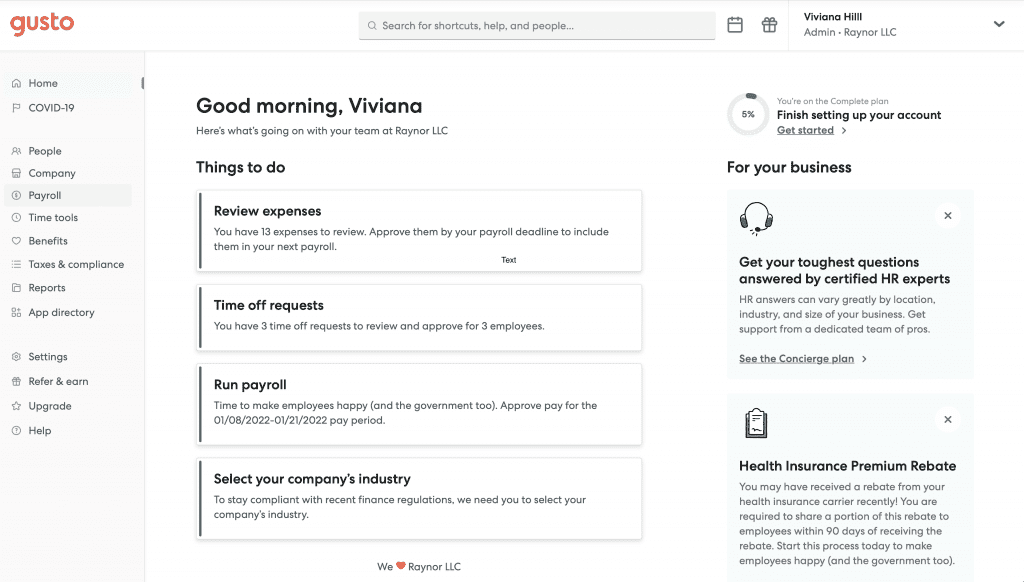
In the menu on the left side of the screen, click Payroll. On the drop-down menu, select Run Payroll.
Step 4: Review Hours & Earnings
After selecting Run Payroll, you’ll be taken to a dashboard to manage hours and additional earnings for your employees and contractors.
On this page, you’ll be able to review and edit earnings and hours for all your employees and contractors, including adding bonuses, cash tips, commissions, corrections, and paycheck tips. Simply scroll down to the appropriate employee or contractor and select the relevant green option to edit it. You can select and edit Employee Hours, Bonuses, Cash Tips, Other Earnings, and Reimbursement.
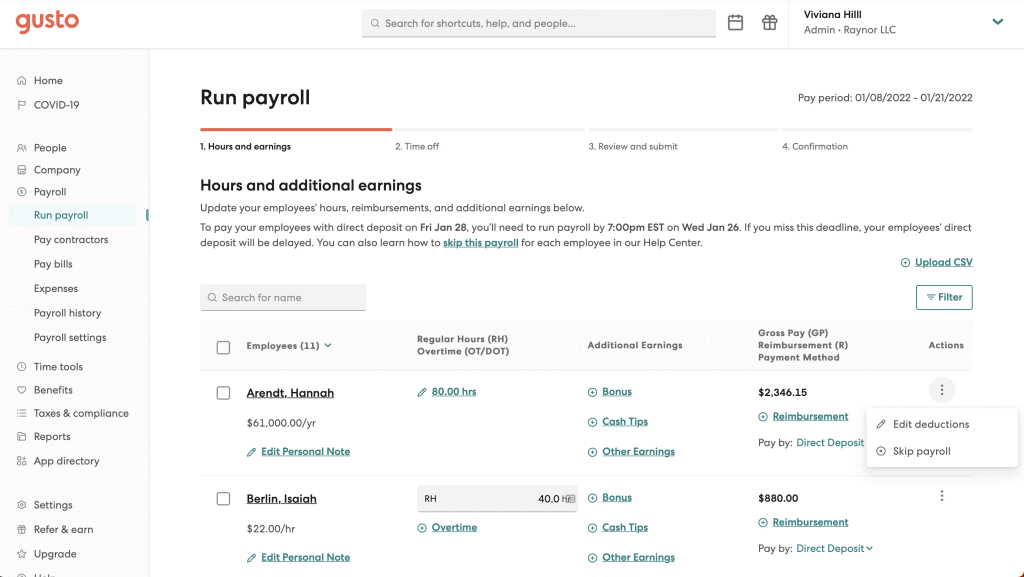
If you need to process deductions and withholdings, select the Three Vertical Dots under Actions on the right side of the screen. On the drop-down menu, select Edit Deductions to make any necessary changes.
Before moving on to the next step, be sure to review any changes you have made. Once you’ve completed your review, select Save and Continue to move on. If you want to cancel the payroll run, you can select Cancel, or if you need to save and come back to the payroll run, select Save and Continue.
Step 5: Review & Edit Time Off
On this page, you’ll see a summary of your employee and contractor time off for the payroll period, including paid time off, sick hours, and additional time off.
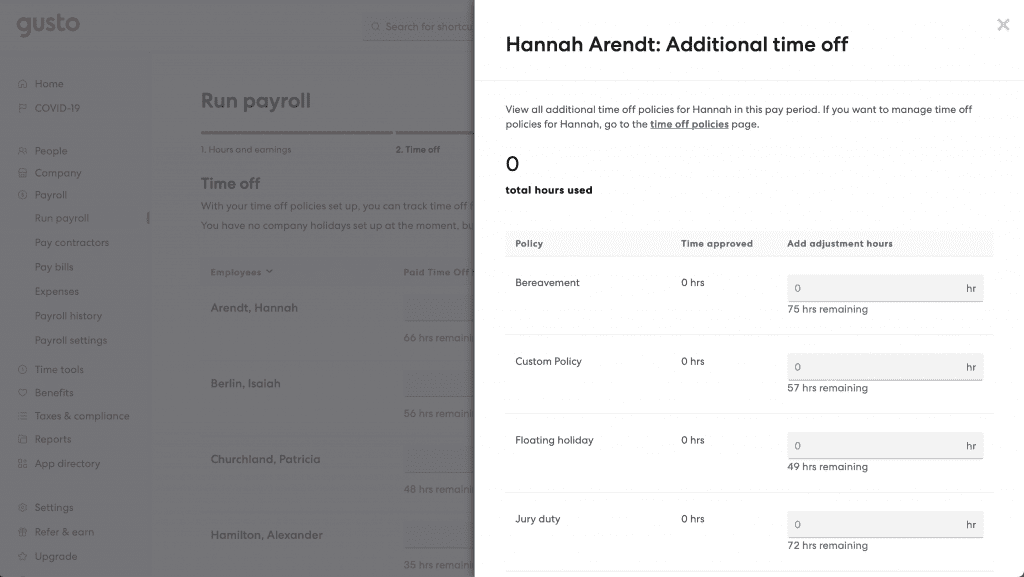
If you need to input time off manually, simply click the corresponding Grey Text Input Boxes underneath paid time off and sick hours. You can input the hour count, including decimals. If you need to submit additional time off for an employee or contractor, select View Details in the Additional Time Off column.
A pop-up menu will bring up the option to submit approved time off hours for Bereavement, Custom Time Off Policies, Floating Holidays, and Jury Duty by inputting the hours into the corresponding Grey Text Input Boxes. You should also note the hours remaining for each time-off policy to determine whether the employee or contractor has exceeded the limits of your company’s time-off policies.
If an employee is missing from this page, you will need to go back to the previous page to add them by selecting Go Back at the bottom of the page.
Review your submissions. If you are ready to move on, select Save and Continue from the options at the bottom of the page.
Step 6: Review & Submit Your Payroll Run
After submitting your final time off information, Gusto will process your payroll run. You will be taken to a Review and Submit page that summarizes all the details and information you submitted. Take a minute or two to review your payroll information and ensure that everything is correct and looks good.
If you would like a simplified summary of your payroll information, Gusto creates three reports that you can view on this screen: What Gets Taxed and Debited, What Your Employees Worked & Take Home, and What Your Company Pays. Click the Arrow on the left of each of these options to drop-down an in-depth report on each topic.
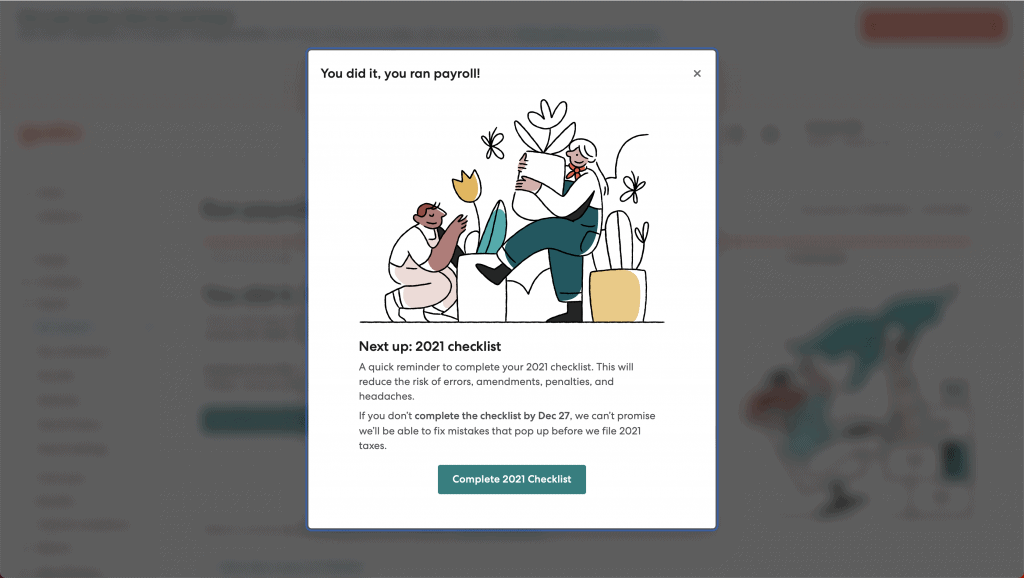
After you have reviewed all the information submitted, select Submit Payroll to complete your payroll run.
Final Tips On How To Use Gusto Payroll
The great thing about learning how to use Gusto is that it’s incredibly easy to use, regardless of your experience level with running payroll. However, that’s just the tip of the iceberg. Getting the most out of Gusto’s platform starts with understanding all it has to offer. To help you maximize your Gusto experience, here are a few tips:
Keep An Eye Out For Encircled Question Marks
Whether you’re running payroll or updating benefits, the Gusto payroll app makes it easy to handle things yourself. If you get tripped up during the process, click on the encircled question mark icons for in-depth explanations on the topic or option you’re confused about.
Get Employees & Contractors Engaged
Employees and contractors can manage payments, benefits, personal details, and much more from within Gusto. Getting your employees on board can help keep their information updated and make changes as needed. Gusto’s Wallet app offers employees the chance to manage their earnings easily, including accessing them early.
Explore Gusto’s Features
As Gusto is billed as a payroll solution, it’s easy to overlook the platform’s other useful features. Gusto offers a robust set of features, including benefits, time tracking, Gusto Wallet, and much more. Spend some time exploring these features to determine which ones would be best to implement in your business.
For more payroll tips, check out these top payroll best practices that small businesses should be using.
FAQs About Using Gusto Payroll
Is Gusto payroll easy to use?
Gusto is one of the best payroll software solutions for small businesses, largely due to its ease of use and straightforward user interface. While Gusto has some impressive automations that can help save you valuable time and energy, manually running payroll is also surprisingly quick and painless.
How do you remove someone from Gusto payroll?
To remove an employee or contractor from your payroll in Gusto, go to the Gusto Dashboard>People>Employee’s Name>Job & Pay>Actions. Here you can submit details about the employee’s dismissal, including their last day, whether the dismissal was voluntary, and the reason for the dismissal. This information will be used to send a report to the state for unemployment insurance and other forms. If you haven’t already paid the dismissed employee, you can choose whether to run a dismissal payroll.
The employee will not be notified of any changes to their employment status when you process dismissals.
Where can you buy checks for Gusto payroll?
Gusto recommends users buy blank check stock from Compuchecks.com and offers a 15% discount on your order when you use the code Gusto15. Gusto supports check printing on personalized stock with the check on top and blank stock with the check on the bottom. Therefore, you can look for other options that may better suit your business’s needs, whether you’re looking for the lowest pricing, customization, or anything else.
Why is Gusto payroll due so much earlier than payday?
Gusto users are automatically placed on the default two-day payment speed. If you are on the two-day payment speed, you must have your payroll submitted in Gusto by Wednesday at 4 PM PT at the latest to ensure that your employees and contractors are paid on Friday. In addition to two-day payments, Gusto supports two other direct deposit payroll speeds: next-day payments and four-day payments. Users may change to next-day or four-day payments, as needed.
How do you change an address in Gusto?
Gusto allows employees and contractors to change their home addresses on their own. To start, employees should click on the Personal Details>manage Home Address>Add Address/ Edit> Save. Contractors should use their business address when submitting their address.