
Best Payment Gateway Providers For Small Business
Read More
Jun 30, 2026
Filed under: Payment Gateways
Stripe is an enormously powerful payments system that has a lot to offer small businesses. We'll show you how to set up your test account to try out the software.

WRITTEN & RESEARCHED BY
Expert Contributor
Last updated onUpdated

REVIEWED BY
Expert Contributor
If you are new to using Stripe for your business, you may be wondering how to create a Stripe account and what the steps are. Below, we’ll walk you through setting up a Stripe account and what you can use it for.
Table of Contents
To set up your Stripe (check out our Stripe review) account, you’ll need a few pieces of information handy. These requirements may vary depending on the country from which you’re operating. They also may vary depending on your business type or structure.
Regardless of these factors, Stripe needs to verify its customers’ identities.
Stripe serves a large number of countries, but you must select the country where your business is registered when you create your account. For a US-based account, you’ll be asked to provide:
Setting up a Stripe account is, for the most part, straightforward.
The first thing you’ll do is sign up for an account through Stripe’s website. If you’ve ever made an account online using your email address, you know what to expect. Choose a secure password. You’ll get a verification email from Stripe shortly after.
That will bring you to a page that looks something like this.

At this stage, you’ll have your test account.
Before entering any of your business data, Stripe allows users to create test versions of:
While this is strictly optional, it’s a low-stakes way to get a feel for Stripe’s dashboard interface.
Stripe has a reputation for being a technical solution for payment processing rather than a user-friendly one. While Stripe is still pretty developer-centric, there’s still quite a bit you can do without needing to know how to code. In fact, Stripe’s dashboard now conveniently tells you which features require code and which ones don’t.
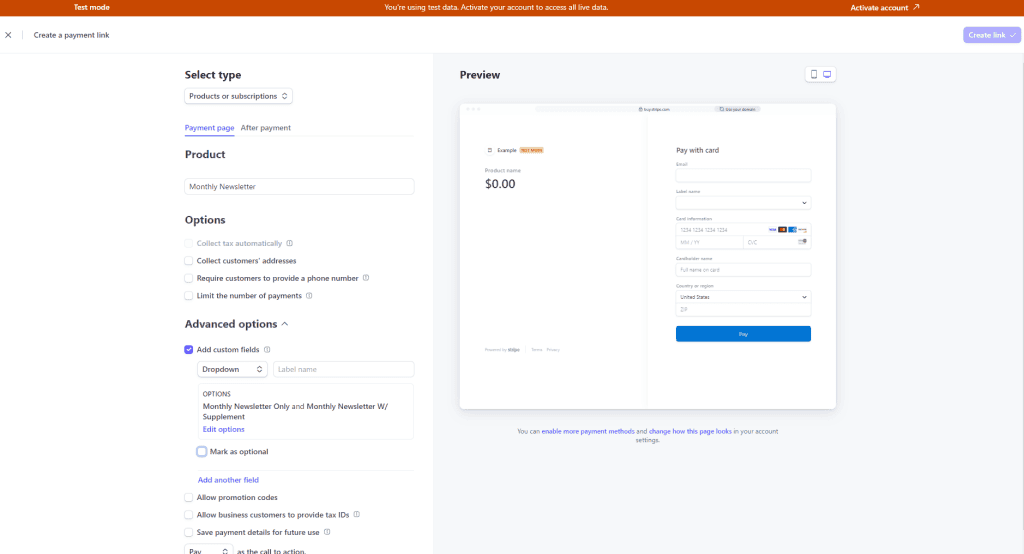
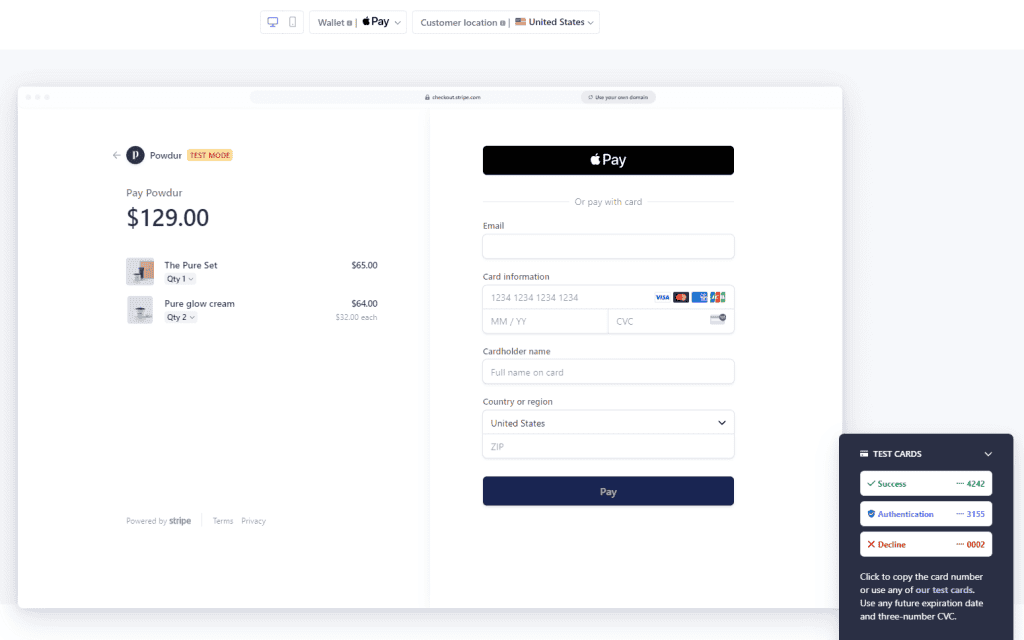
A payment link is, simply, a link to a checkout page, which you can then use to invoice a customer. Stripe’s dashboard allows some modest customization of the checkout form, including what information you require from the customer to process the transaction. You can also change the text of the confirmation page the customer will see after making a payment or forego the confirmation page entirely.
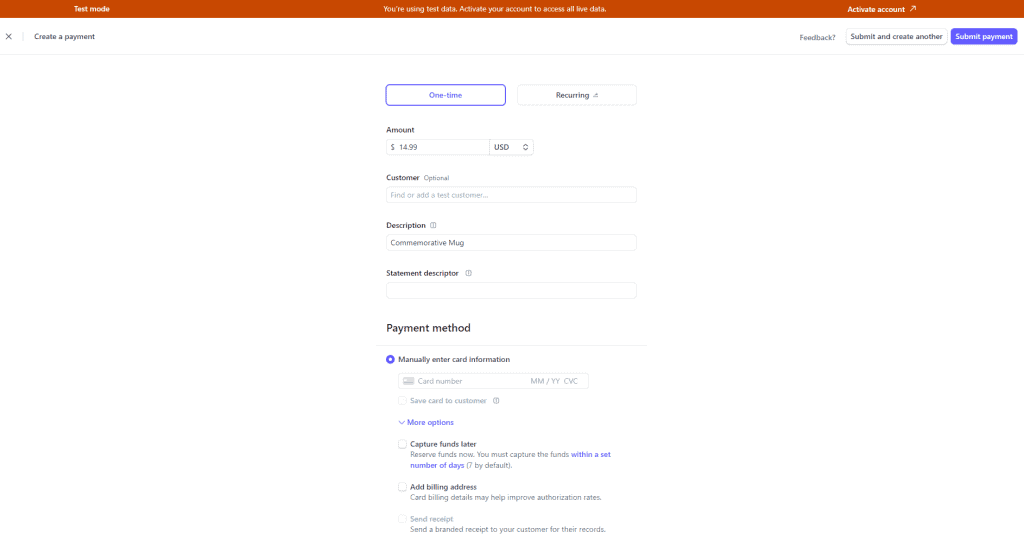
You can also create a payment by manually entering a customer’s credit card information into Stripe’s virtual terminal. Just be aware that if you use this option for a real payment, it will cost you an additional 0.5%. This is because manually entered cards are considered to be a greater security risk.
If you have the customer’s payment information on file, you can import it into the virtual terminal instead of entering it manually. You’ll still be on the hook for the extra 0.5% though.
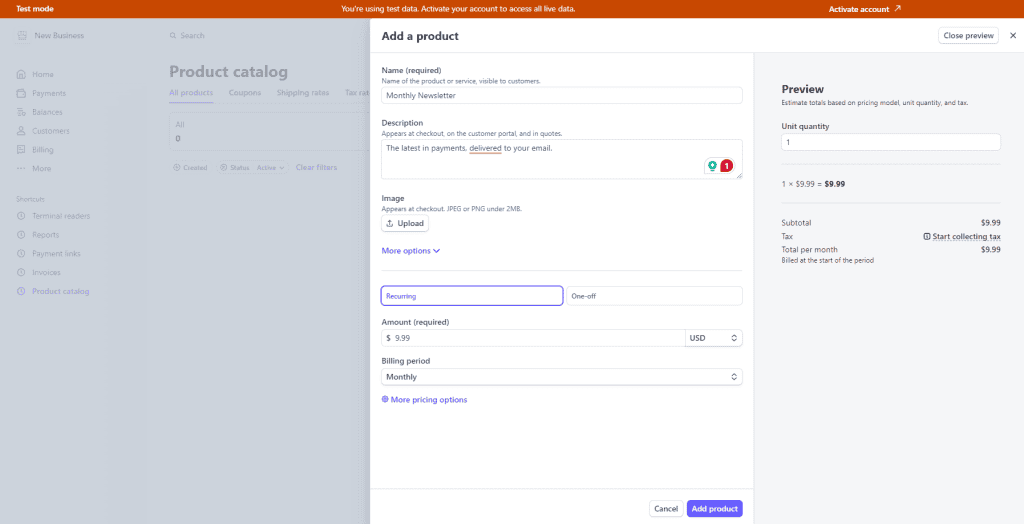
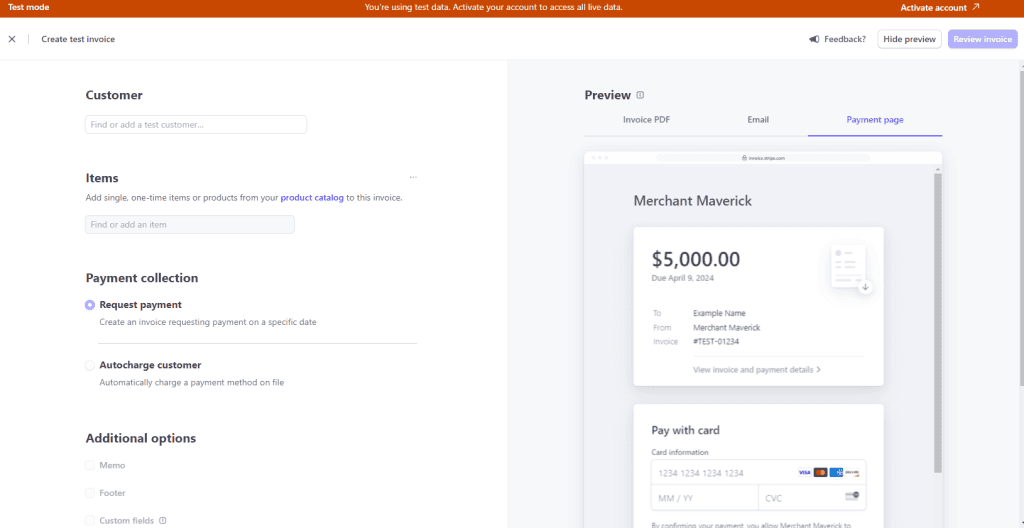
You can also create invoices to charge customers. You’ll add a product from your created list, and either charges a payment method you have on file or request payment from the customer. The invoice can then be emailed to your customer or exported as a .pdf.
If you know how to code but aren’t much for design, you can embed Stripe’s pre-generated, responsive checkout page into your website. The checkout pages do allow for some toggle-based customization, so you do have a decent amount of control over what they look like.
You’ll need to install Stripe’s library in the language of your choice (Ruby, Node, PHP, Python, Go, .Net, or Java), setup a server and create a test payment.
For those looking for more precise control over what their payments UI looks like, there’s Stripe Elements. Rather than providing a prebuilt checkout form, Stripe Web Elements gives you a Javascript library of responsive design elements you can use to build your user experience.

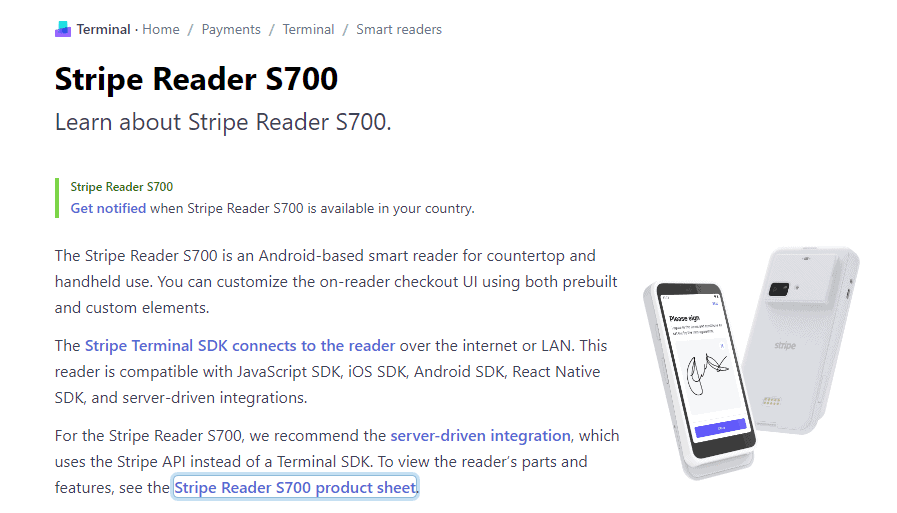
Stripe is mainly an eCommerce payment solution, but it’s possible to accept in-person transactions by implementing the Stripe Terminal SDK. You’ll need a compatible mobile reader to capture card information.
As is the case with the Stripe Checkout and Stripe Elements, you’ll need to set up a server using Stripe’s library (available in Ruby, Node, PHP, Python, Go, .Net, or Java). You’ll then need to connect your card reader to your backend using a secret connection-token.
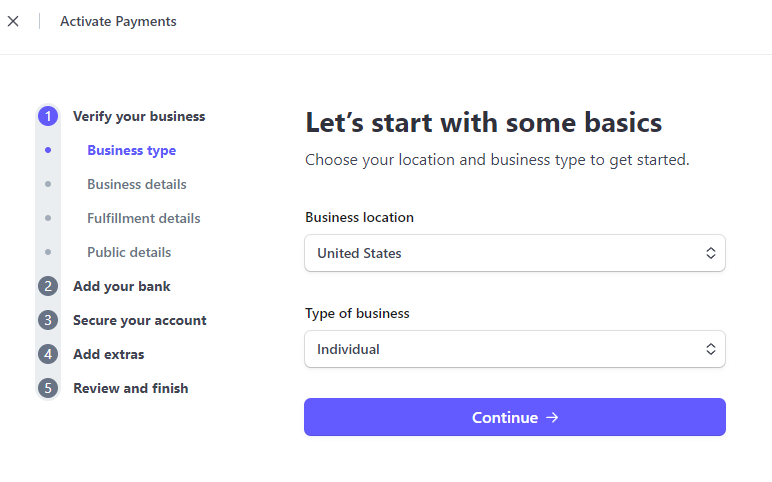
If you want to do more than just test out features, you’ll need to complete the activation of your account. You can do this by clicking on the Activate Payments link at the top of the screen. Stripe will then walk you through a series of prompts.
Stripe needs to know a bit about your company’s goods or services. Simply check all the fields that apply to your company. You’ll also need to link your Stripe account to a bank account.
Afterward, you’ll be asked to add some public details about your company. These will be visible in payment statements, invoices, and receipts. You’ll also have the option of adding automated tax collection and participating in Stripe’s carbon removal program. If you aren’t sure if you want to participate in these, decline for now. You can always sign up for them later.
Stripe offers immense functionality as a payment platform for its base transaction price of 2.9% + $0.30. With that, you’ll get:
For additional fees per transaction, monthly fees, or one-time costs, you can also get access to:
You can create multiple Stripe accounts with the same email address and toggle between them through the Stripe dashboard. In fact, Stripe requires businesses to use separate Stripe accounts for projects, websites, or businesses that operate independently from one another. For example, you must create additional accounts if you manage multiple businesses with separate tax IDs.
Having multiple accounts provides some advantages, such as easier bookkeeping or allowing you to use different bank accounts for payouts, including settling transactions in other currencies.
Now that you’ve set up your Stripe account, you can begin to access Stripe’s vast ecosystem and compare it to those of Stripe’s biggest competitors and other payment processors that allow you to accept credit card payments instantly.
Most importantly, you can begin processing payments. Stripe generally pays out every two business days, with the exception of the initial 7-14 day verification window. Read our guide for a deeper dive into how Stripe works. You can also check out our Stripe pricing guide for a better idea of how much it costs to use Stripe.


Want to help shape the future of the Merchant Maverick website? Join our testing and survey community!
By providing feedback on how we can improve, you can earn gift cards and get early access to new features.
Help us to improve by providing some feedback on your experience today.
The vendors that appear on this list were chosen by subject matter experts on the basis of product quality, wide usage and availability, and positive reputation.
Merchant Maverick’s ratings are editorial in nature, and are not aggregated from user reviews. Each staff reviewer at Merchant Maverick is a subject matter expert with experience researching, testing, and evaluating small business software and services. The rating of this company or service is based on the author’s expert opinion and analysis of the product, and assessed and seconded by another subject matter expert on staff before publication. Merchant Maverick’s ratings are not influenced by affiliate partnerships.
Our unbiased reviews and content are supported in part by affiliate partnerships, and we adhere to strict guidelines to preserve editorial integrity. The editorial content on this page is not provided by any of the companies mentioned and has not been reviewed, approved or otherwise endorsed by any of these entities. Opinions expressed here are author’s alone.